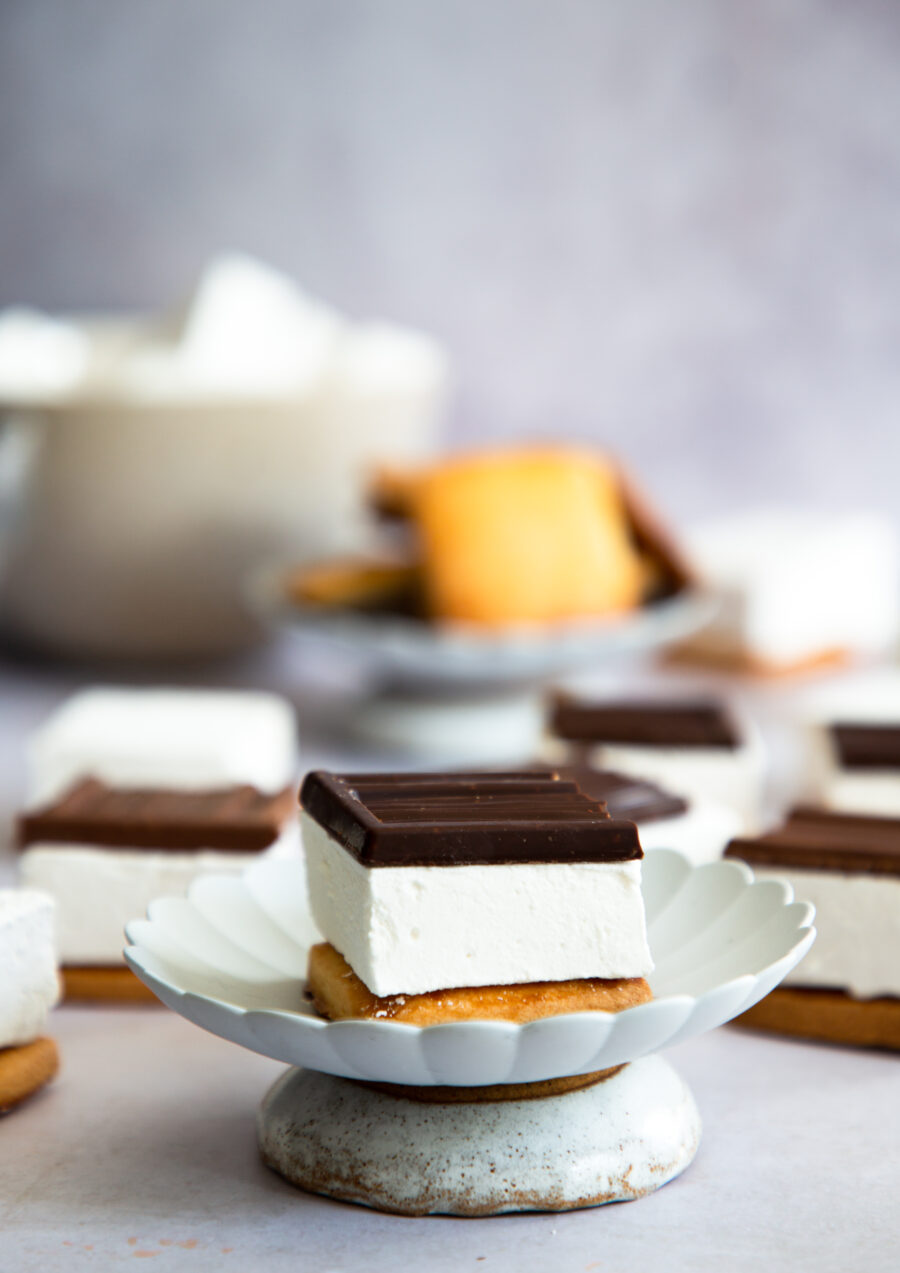
Paid partnership with Menier: campfire s’mores
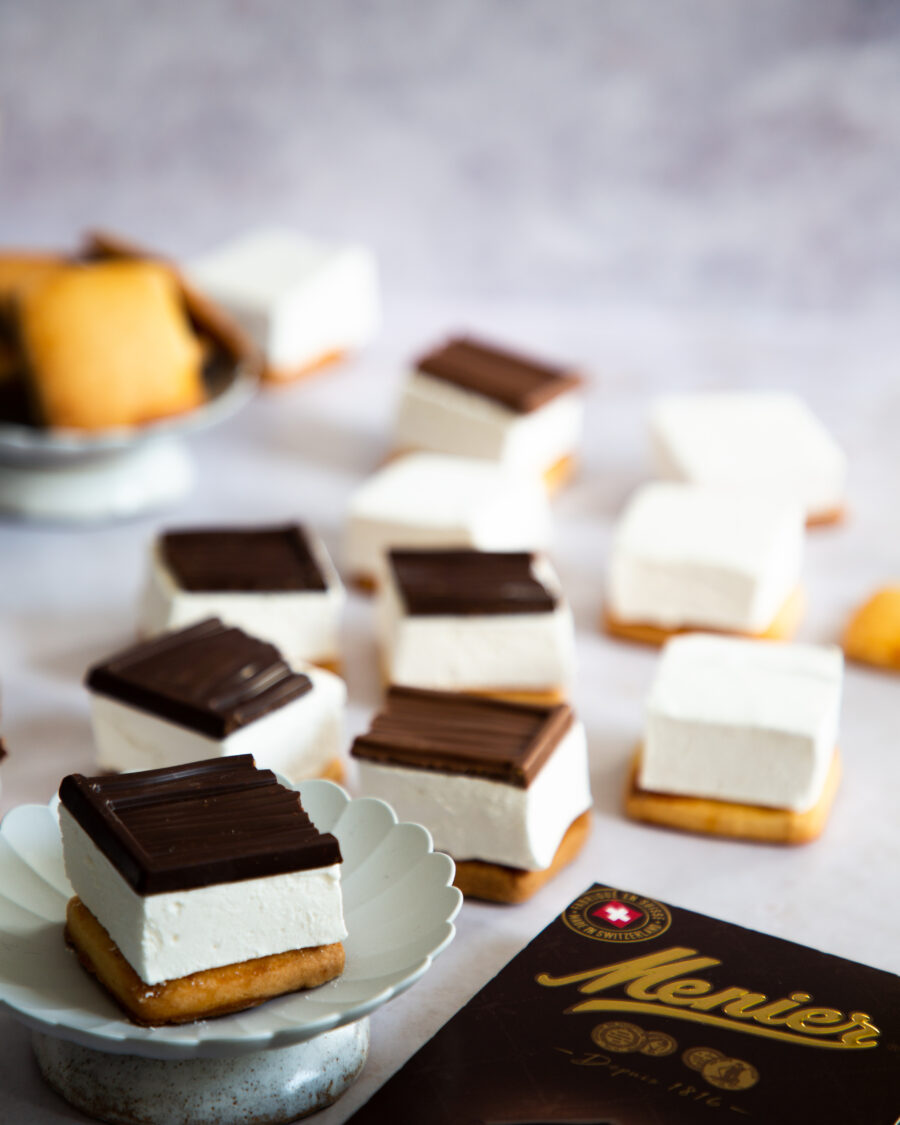
I recently partnered with Menier to create these campfire s’mores to showcase their amazing new range of Gourmet Eating Chocolates. This pure and simple recipe for autumn/winter is an absolute must-make! Menier’s premium, high quality Swiss chocolate is made with sustainably sourced ingredients and comes in four flavours. You can choose from 70% or 80% cocoa, or milk and dark salted caramel versions. Plus, it’s the perfect topper for salty galette au beurre and fluffy vanilla marshmallow for a campfire s’more like no other. You can find their new range of irresistible eating chocolates in WHSmith travel sites now.
Before you begin making campfire s’mores:
Firstly, I highly suggest read through this recipe in its entirety before starting to make these campfire s’mores. They’re super easy to make but do require additional time to allow the marshmallows to set properly. Secondly, reading through everything before you start will help you understand the process. If you’re making these with children, make sure they aren’t anywhere near the kitchen when making your marshmallows – hot sugar syrup can burn. Thirdly, you can prepare the marshmallows and the galette au beurre in advance and keep them in an airtight container for up to one week. When you’re ready to eat them, simply assemble with the chocolate! Read on for some of my favourite serving suggestions.
What makes these campfire s’mores so great?
Personally, I love making s’mores because there are so many great ways to enjoy them. Here are a few of my favourites:
- Create a s’mores charcuterie board: add the galette au beurre, the marshmallows and some pre-cut squares of Menier’s new Gourmet Eating Chocolate to a platter, then serve at the end of dinner party and allow everyone to assemble their s’mores themselves.
- Create a s’mores gifting kit: package up a set of biscuits and mallows, then gift them with a bar of Menier’s new Gourmet Eating Chocolate. A surefire way to someone’s heart!
- Make a chocolate fondue: a true winter warmer, chocolate fondue is always a winner! Melt some of Menier’s Gourmet Eating Chocolate then grab some wooden skewers and spear your marshmallows. Char your mallows on the burner, then dip into the melted chocolate and place on top of your galette – ready to eat straight away.
What you’ll need:
- Sugar thermometer – get one like this, that tells you where the soft-ball stage is!
- Scraper – I have this one from Divertimeni {or you can use a rubber spatula}
- 9 x 13 inch tin – this Nordicware tin is amazing
- Metal bowl {or a thick glass Pyrex bowl}
- Heavy duty / cast iron saucepan – I have something like this that I use {Le Creuset are also great}
- Oven gloves
- Electric whisk
- Chef’s knife {recommended}
- Sieve
Campfire s’mores
Ingredients
For the galette au beurre
- 135 g salted butter softened
- 125 g icing sugar sifted
- 1 large egg
- 250 g plain flour sifted
- milk for brushing
For the marshmallows
- 333 ml warm water + an extra 167ml for the gelatin
- 36 g powdered gelatin
- 500 g granulated sugar
- 320 ml corn syrup
- 1 vanilla bean split and scraped
- 2 tsp vanilla bean paste
- 30 g icing sugar
- 30 g cornflour
- 1/4 tsp kosher salt
- salted butter for greasing
For the chocolate topping
- 2-3 bars Menier Gourmet Eating Chocolate choose from 70% or 80% cocoa, and dark or milk salted caramel.
Instructions
To make the marshmallow
- Start by making the marshmallows. Prep everything in advance: split and scrape your vanilla bean, then grease your 9 x 13 inch baking tin using some salted butter. In a separate little bowl, sift together your cornflour and icing sugar, making sure there aren’t any lumps in the mixture. Sprinkle about half of the dry ingredients into the buttered tin, so the powder sticks to the butter. Rotate and tap the tin to evenly coat the bottom and sides, then get rid of any excess by turning the tin upside down over your bin or sink. You want a generous coating to avoid the mallow sticking to your tin. Butter a dough scraper or rubber spatula with butter. Set everything aside for later.
- Pour 167ml of water and all the gelatin into a metal bowl {you *can* use glass, but make sure it’s heatproof – I would highly advise metal though!}. Stir this together to make sure the water will be evenly absorbed by the gelatin, then set it aside. N.B. The gelatin will soak it up and set. Don’t worry, we’ll melt it with the hot sugar and then whisk it together again!
- Attach your sugar thermometer {make sure it doesn’t touch the bottom} to a heavy bottomed saucepan (something like Le Creuset is perfect, or equivalent), and over a medium-low heat, melt together: sugar, 333ml water and corn syrup until the mixture comes to a low steady simmer. Do not stir it. Simply let the mixture mildly bubble until it reaches 240F or the “soft-ball” stage. This may take a while – around 10-15 minutes, but be patient and keep watching your mixture. If you need to turn up the heat to get it there, do so slowly and don’t take your eyes off it.
- Here’s where you need to be really careful. Using an electric whisk, whisk the gelatin to break it up {it’ll have set like jelly}. Cover your hands with oven mitts and remove the sugar mixture from the heat. Ask someone else to help by tipping the bowl with the gelatin in towards you at a 45 degree angle. Make sure their hands are also covered, and that there aren’t any children about when doing this.
- Pour the hot sugar syrup into the bowl, hitting the side as your go to avoid any unnecessary splashes. You want a slow and steady stream, until all of the sugar syrup is in your bowl.
- Add pinch of salt, your vanilla bean {split and scraped} plus the vanilla bean paste then turn on your electric whisk to its lowest setting. Be really careful to stand back from your bowl to avoid getting splashed with hot sugar. Whisk for one minute before increasing the speed.
- Slowly increase the speed of your electric mixer and whip for approximately 8-10 minutes, or until your mallow mixture turns white and looks thick and glossy. If they need to be whipped for a little longer, continue to do so until the outside of your bowl isn’t warm to the touch anymore. The mixture should be really thick, and very sticky – similar to marshmallow fluff {and not whipped cream}.
- Once the mallows have reached the right consistency, take your pre-buttered dough scraper or a large flexible spatula and scrape the sticky mixture out of the mixing bowl and into the 9 x 13 inch baking pan. Work as fast as you can to get it in the tin, as it tends to dry and set quite quickly. Use the scraper or spatula to even out the top.
- Let it set for about 4 hours. If you’re leaving them out for longer {like overnight}, cover with clingfilm.
To make the galette
- While the marshmallow sets, make the galette by whisking the butter and the icing sugar in a mixing bowl.
- Add the eggs, mixing to combine, then sift in the flour.
- Turn the dough out onto a sheet of baking parchment, cover with a second sheet and roll out to a thickness of 2-3mm.
- Put in the fridge for a minimum of one hour.
- When you're ready, preheat the oven to 170C / 325F / Gas Mark 3.
- Take your pre-rolled dough out of the fridge and remove the top layer of baking parchment. Using a square biscuit cutter (about 5cm x 5cm in size), cut rounds out and arrange them on a baking tray lined with parchment.
- Brush the galettes with milk, then bake for 18-20 minutes until light golden brown.
To finish
- Once the marshmallow has set, sprinkle the other half of the cornflour and icing sugar evenly on top of the set marshmallows.
- Use a sharp knife to go around the edge of the tin and invert it onto a chopping board. You might need to use your fingers to get underneath the mallows before inverting the tin. They’ll be quite malleable and flexible so don’t worry too much about getting a bit tough with them to prise the mallow from the bottom of your tin.
- Once the marshmallows are out, measure out 5cm x 5cm squares using a tape measure and make small incisions to guide you on where to cut. Cut them into squares with a sharp, buttered chef’s knife – the butter is going to help avoid any sticking. The sharper the knife the better.
- Make sure your Menier chocolate is at room temperate then cut into 5cm x 5cm squares as well. If it's come straight out of the fridge, it'll likely crack and splinter.
- Place a square of mallow on top of a galette au beurre, then top it with a square of Menier chocolate.
- Optional: use a blowtorch to brûlée the mallow and melt the chocolate on top for a s'mores style finish. Eat straight away and enjoy!
Notes
Subscribe to my coffee chats
Subscribe to my bi-monthly newsletter for exclusive recipes, as well as early access + discounts to newly launched workshops and e-courses. You can unsubscribe at any time.