This Food Photography Gear Guide has been a highly requested post for some time now. However, there are a few caveats to note before we dive in. All the gear I mention in this guide are pieces that I have invested in over the last three years, and as my business has grown and I have gone full time. There is absolutely NO need to purchase everything you see here in order to create beautiful photos of food or videos that you’re proud of. It also depends whether you view food photography as a passion, or are seriously looking to up-level and turn that passion into a career. Some investments are big and scary, but mean you can provide higher quality content for clients. If you simply enjoy food photography as s hobby however, then you by no means need all the gismos and gadgets in this guide. Focus on nailing your lighting, composition and editing first.
Are you a beginner to food photography?
If you’re a beginner, I have a comprehensive FREE resource on how to create stunning photos of food with the camera in your pocket (aka your iPhone or Android). Simply subscribe to my newsletter and join my coffee chats to receive it!
I hope that you find this Food Photography Gear Guide helpful as a starting point in investing in your passion or business! These links and resources are mostly related to Canon as this is what I personally use. For full transparency, this blog post contains affiliate links which means I make a small commission on anything purchased via those links. This helps to support my business and also gives you a lovely discount. Win-win!
If you have any questions, either leave a comment of drop me a DM on Instagram. Have you got a cup of tea? Ok, let’s get into it!
Want to skip to a specific section of this Food Photography Gear Guide? Hit the links below:
- Essentials
- Camera body + batteries
- Lenses
- Tripods
- Lighting and Modifiers
- Editing and software
- Tethering Tools
- Props + backdrops
- Styling Kit
- Helpful courses and resources
Essentials in my Food Photography Gear Guide:
- I have a few camera spirit levels that I can slide into the hot-shoe of my camera (or trigger, if I’m using flash). They’re so cheap but really make it all that much easier to ensure your image is level before getting the shot.
- A memory card that has adequate space is a must, even when shooting tethered. Make sure you have one with ample storage. I personally have two of these SanDisk cards which, when full, are transferred and reformatted before using again.
- Back up, back up, back up! Disasters unfortunately occasionally happen, which is why backing up images and video files where possible is a no-brainer. Having multiple back-ups is a surefire way to ensure you don’t lose any valuable work if the worst happens (we’ve all been there). I personally back up to an external hard drive and also use BackBlaze – an online and cloud storage backup. Essentially a backup for the backup, because you really never know when you might need it.
- I have multiple heavy-duty spring clamps for various things in my studio – whether it’s clamping backdrops to my shooting table to ensure they don’t budge, hanging backdrops from my C-stand or holding up smaller pieces of card. Be sure to get a variety of sizes to cover all bases.
Camera body + batteries:
- I’ve been using my Canon 5D Mark III for the past year or so and find that it’s a phenomenal full-frame camera that takes high-quality photos and videos. I bought my body second hand off eBay. The model is over 10 years old, and while there are newer models with more features, the 5D Mark III has stood the test of time so you’d be able to find it at a reasonable price. If you’re thinking of taking your food photography to a professional level, investing in a full-frame camera is where it’s at! Full-frame sensors allow for a shallower depth of field than their cropped counterparts. For food photography where you may want to introduce some bokeh (that blurred background), you’ll be best served by a full-frame sensor.
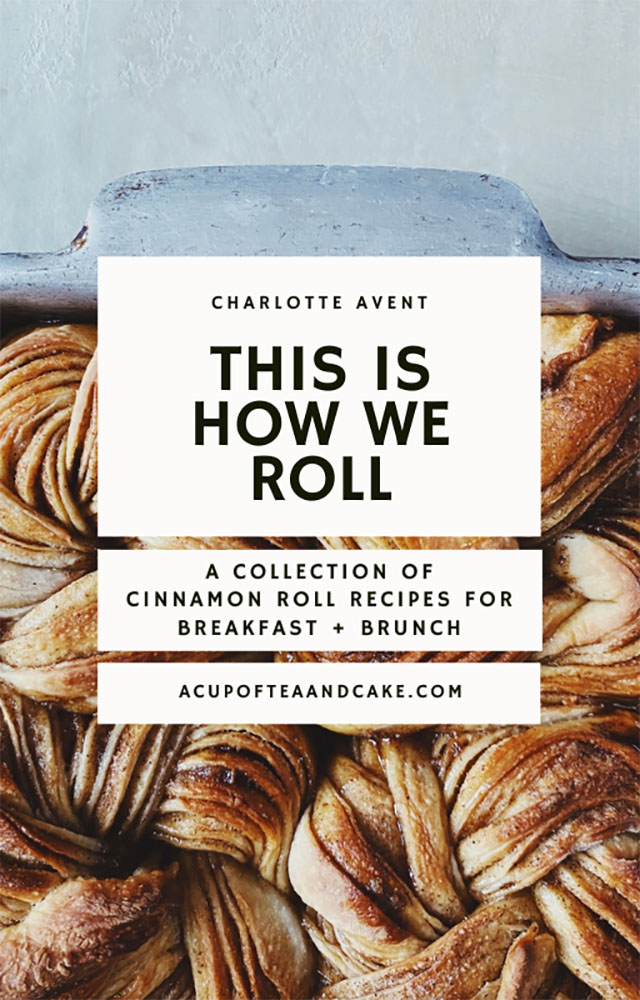
- For a LONG LONG time I practiced food photography using just my iPhone. And I’m talking an iPhone 11 – meaning since then, phone cameras have seriously improved and offer f-stop adjustments, portrait mode and exposure (ISO) settings. My Olive Oil, Orange and Thyme Loaf recipe and a lot of the images I took of cinni rolls for my e-book were snapped using just my phone. I also used to shoot video in 4K using my iPhone, using nothing but natural light. There are some great apps like InShot which can help video editing if using your phone.
- Having at least two batteries is CRUCIAL if you’re shooting professionally. Depending on the type of photography you’re doing, you may need more (eg. wedding photographers would likely need a number of fully charged batteries for a whole day wedding shoot). When prepping for shoots, I used to charge both batteries back to back, but you can buy dual chargers which allow you to charge multiple batteries at one time. These are great if you’re shooting outdoors where you may not necessarily have a power outlet to plug in one battery after the other.
Lenses:
These lenses are most commonly used in food photography and are most regularly used on rotation – hence their appearance in my food photography gear guide.
- 50mm f/1.4. The nifty fifty, as it’s most commonly known, is a brilliant lens for food photographers. Capture beautiful table scenes with this lens, and in lower light conditions with its maximum aperture of f/1.4. The f/1.8 can be bought as a really reasonable price (~£100) as a starter lens if you’re at the beginning of your journey.
- 24-105mm f/4. An all-rounder. This lens is an investment but is thoroughly worth it for its versatility. This is a high quality zoom lens, that has IS (image stabilisation) features, which is great if you don’t like using a tripod. The 24-70mm f/2.8 is also highly recommended with a small aperture of f./2.8 to produce that gorgeous bokeh.
- 100mm f/2.8. I personally don’t yet own a 100mm lens. It’s again an investment, although you can find some second-hand in very good condition. I absolutely adore macro photography and that beautiful bokeh (the blurry background) you get with a lower f number but it’s certainly not my “signature” style, as I much prefer flat lay photography and usually more aspects of my images to be in focus. Saying that, this is definitely a lens that I would like to add to my collection.
Tripods:
- C-Stand. I purchased a Neewer C-stand mainly for the ease of capturing overhead shots, however they are also great for holding up backdrops or modifiers and diffusers, or rigging lighting to. I find that a C-stand provides a far sturdier platform to hold a heavy-duty camera overhead, and allows me to position my camera correctly for flat lays. Remember, you’ll need a sandbag as a counter-weight to your camera, and a Manfrotto 014-38 16mm Female Adapter as well as a Manfrotto 234RC Monopod Tilt Head with Quick Release to mount your camera. I talk more about this in my Kit highlight on Instagram here.
- Manfrotto MK190XPRO4 Tripod and XPRO Ball Head with 200PL Plate. This tripod is incredible. It’s sturdy and easy to adjust whenever necessary. I believe you can also buy a 90-degree arm that can be used for overhead photos, if you prefer this option to a C-stand or are only looking to invest in one type of tripod.
- Overhead Pro Tripod Kit. This was a great tripod when I started out, as it’s super easy to use with a phone. You can also attach your DSLR to this tripod, but again, you’ll require a counterweight. In my personal opinion, I would invest more in the Manfrotto tripod to use with a DSLR but this was great when I used only my phone.
Lighting and Modifiers:
Flash photography
- I use a Godox V860iii speed lite for product photography shoots, some drinks photography and when I’m shooting in winter, or for restaurant photography where there may be low light conditions.
- A snoot is brilliant for drinks photography to really focus the light on your subject.
- Rechargeable batteries and a charger are essential with flash as you’ll need these for your trigger.
Video Content
- I use a mid-range Godox SL150ii LED continuous light for all of my video content. I’d advise against going for its cheaper 60w alternative as it just isn’t as powerful, especially for professional videography.
- You’ll also need a blackout of some sort when using a continuous LED to eradicate any natural light that can affect consistency. A friend of mine very kindly made a super cheaper black out from blackout stage fabric she bought off eBay which fit the measurements of my window. It has a velcro strip along the top long edge and I then used double-sided sticky tape to stick the other side of the velcro to my window frame. Super cheap and super easy! I find a roller blind still lets light in around the edge and this was by far the best solution.
Lighting Stands and Attachments
- This Neewer stand is great for LED lights, speed lites or for simply clamping a diffuser too. Having a couple of these is super useful!
- You’ll need a Bowens mount (which attaches to your light stand) in order to mount your speed lite or LED. Always check that this type of mount is compatible with your particular equipment.
- You’ll also need a trigger to communicate with your speed lite and ensure it fires when you take a shot. This is the one I use, but again, be sure to check this is compatible with the speed lite you’ve purchased.
Modifiers
- The cheapest and most versatile diffuser is a large 5-in-1 diffuser. You can even go bigger than this one!
- If you’re small on space, and need something that can be constructed and deconstructed easily, this 120cm umbrella-style octagon is ideal for use with a speed lite. The bigger the modifier, the more diffused the light and the softer the look.
- I also own a strip box modifier for drinks photography and when I want to create a moodier and more atmospheric aesthetic.
- When using continuous lights, my 120cm x 80cm rectangular modifier is perfect for creating a more natural lighting look. This particular modifier attaches to the bowens attachment of my LED, and once constructed is meant to be left up. You need the space with these types of modifiers as they’re a bit of a faff to put together with their rods etc, so ideally you’d keep it constructed at all times in your home or studio.
Natural Lighting: fill and bounce cards
- Head to your local arts and crafts store to pick up some black and white foam boards, mount board and other cheap pieces of firm card to use as fill and bounce cards. I can never have too many, and have various sizes depending on the look I’m trying to achieve. Fill cards (black) are going to be great for adding shadow and for moodier, more atmospheric shots while bounce cards (white) will reflect any light back onto your scene adding extra airiness or shine from reflections.
If you’re looking for everything I use in one useful place, you can find all my equipment categorised here at my Amazon Storefront:
Editing and Software:
- VSCO is great if you’re starting out and want a huge amount of editing variety straight from your phone. You can use the app for free, but they do also have a paid service.
- Unfold is wonderful if you want to create gorgeous social stories. Again, to unlock all the templates, you’d need to purchase the paid-for service.
- Adobe Lightroom and Photoshop are my go-to for editing and retouching or compositing client imagery.
- Adobe Premiere Pro and After Effects are what I use to editing any type of video content, but if you’re starting out iMovie is great, as is InShot (a free app) which both require far less learning hours than the Adobe programs.
- Dragonframe is brilliant for stop motion animation and has super useful features that are incredible for animators.
Tethering Tools:
- Tethering absolutely changes the game when it comes to professional photography. If you’re looking to take your photography to the next level and are seriously considering it as a career, then being able to tether your camera directly to your computer is a godsend! TetherTools sell cables of all lengths and with different adapters. I use a USB-C (with a USB-B adapter that I bought off Amazon, because I recently purchased a new laptop with this port) to connect my camera to my laptop, which then boots up Canon’s EOS Utility 3 software. This means I’m able to see what my camera sees on a big screen, as opposed to the tiny one through my viewfinder (or on the small back screen of my camera body). Joanie Simon has a great video here to show you how to do this, although software may be different depending on the type of camera and equipment you’re using.
Props & backdrops:
- On a budget and like to get crafty? Making your own backdrops is not as difficult as it seems! You can find some great tutorials on YouTube on how to do this yourself.
- If you want to buy backdrops, then my favourites have always come from Capture By Lucy, Photo Surfaces and Club Backdrops. Black Velvet Styling also do high quality backdrops, and I honestly love The Photography Bite‘s hand-painted ones too.
- My prop collection is an ever-growing, but carefully curated selection so that everything tends to work together when it comes to planning client shoots. Whether I’m sourcing pinch bowls, linens, cups, plates, vintage enamelware or other, there are a few places I always return and remain true to. Nom Living, Jess Jos, Fiona May Ceramics, and Wilbur & Wolf are just a few. You can also bag some wonders in the sales. Shops like Anthropologie and West Elm have beautiful props, as do Zara Home, H&M Home and Dunelm. EBAY and Etsy are great shouts for more unusual or vintage pieces.
Styling Kit:
My food photography gear guide wouldn’t be complete without all the necessary tools I use to style my scenes. Here are my absolute essentials that are part of my food styling kit to make any food look delicious:
- Cotton buds. Ideal for removing small spillages on props or backdrops, or for clean-ups where you don’t want to disrupt your scene.
- Tweezers. Super useful for making tweaks to anything on set, tweezers allow you to have more precision and are my most commonly used piece of kit. Much easier than getting your fingers in there!
- Paintbrushes. A small selection of different sized brushes are great for adding oil, water, glycerine or any other liquid substances to your food.
- Blowtorch. Be sure to buy a high-quality blowtorch so you can melt cheese on set, add colour to pasta dishes or toast marshmallows right before shooting.
- Straws. An easy way to add condensation to glasses on cold drinks, create droplets on ice cream just where you want it, and blow away and smaller crumbs that you may not want on set.
- Foam make-up wedges. Perfect for propping up layered foods or holding stacks in place. They can also be cut to size.
- Bamboo skewers or cocktail sticks. Great for keeping pancake stacks and burger fillings in the right place without everything topping over!
- Blu-tac. Brilliant for keeping things in place.
- Beef stock pots. These are great if you need to add colour and/or moisture to meat.
- Tampons. I’m sure you’ve heard of this one! Sometimes when shooting hot food, by the time you’ve plated and styled it, your food isn’t hot anymore. Soak a tampon in boiling water and place it out of shot (behind your subject) to create steam on set.
- Small bottle with spray attachment. Fill with glycerin to ad small droplets of “water” to salads or drinks glasses, or spruce up fruit and vegetables.
- Water spray. An Evian face mist is perfect and can be used in a similar way to your glycerin spray bottle.
- Pipettes. These will give you ALL the control when you want to add a dribble of ice cream melting down the side of a cone, chocolate sauce to sundae, or a drizzle of caramel from an apple pie just in the right place.
- WD40. Superb for blowing away all the crumbs and bits and pieces that are either in the way on set, or for quickly cleaning a backdrop before using it again for another dish.
- Brown twine and ribbons. I like to have a selection of brown, red and white, and green and white twines alongside some beautiful satin ribbons for tying things up on set or adding elegance to a scene.
Helpful courses and food photography gear guide resources:
- Artificial Light Academy. I took this course last year as I was still working my corporate role and shooting was therefore limited to evenings and weekends. In the winter (and living here in the UK), it tends to get dark around 3pm so artificial light was a game changer. Joanie Simon is a sensational educator and this course taught me absolutely everything, from equipment and set-up to how to shoot various scenes using artificial light. All of my videos are filmed with artificial light and while I favour natural light for photography, there are occasions where flash is vital.
- Foodtography School. Another course that I purchased and enjoyed from beginning to end at the beginning of 2021. There have different courses depending on what you’re after, as well as helpful templates and guides that can be applied to business. Get 15% off courses + product purchases using code TEAANDCAKE.
- Kimberly Espinel. I hugely admire Kimberly’s work and was grateful to have her as a mentor for 3 months during the summer of 2021. At the time, I had just gone part-time in my corporate role and was essentially “testing the waters” of what it might mean to go full-time in my business. I secured my first long-term client shortly after working with her.
Other resources like my Food Photography Gear Guide that you might like: